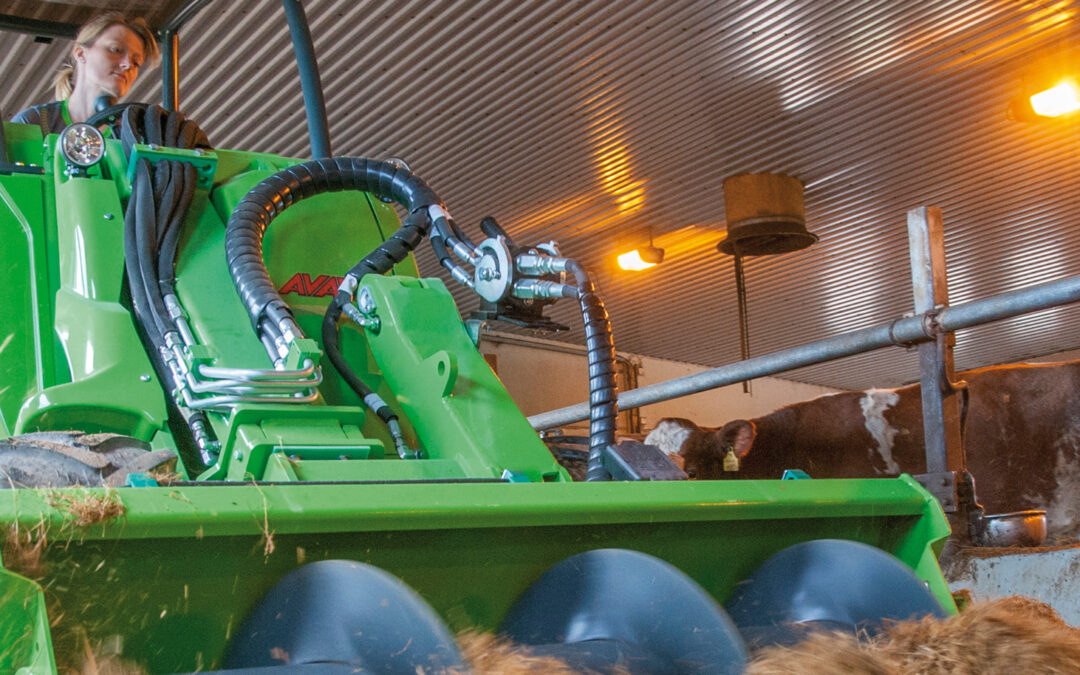
Downtime and unexpected repairs can disrupt any farming operation. Agriculture equipment such as tractors, planters, and sprayers often operates in tough field conditions, putting hydraulic hoses at risk of abrasion, leaks, or bursts. Protecting these hoses is critical to maintaining productivity, worker safety, and equipment longevity.
Caplugs offers a range of hose protection solutions designed to keep your equipment and farm workers safe while minimizing costly downtime.
Hose Proctection Spirals: Superior Abrasion Resistance
Our Safeplast Safe-Spirals and Pig’s Tail Spiral Wraps are engineered for hoses that frequently contact rough surfaces. These spirals provide:
High resistance to wear and tear
Convenient bundling for multiple hoses
Improved organization and protection of hydraulic lines
For faster installation, use our Pig’s Tail Wrapman Unit or Safe-Bundler. The Wrapman handles hoses from ½” to 1 ¾” OD, while the Safe-Bundler attaches to an electric drill for ergonomic installation on single hoses or bundles.
Safe-Sleeve: Safety and Leak Control
Worker safety is just as important as abrasion protection. The Safeplast Safe-Sleeve is made from high-yarn-count polyester, designed to contain hydraulic fluid in the event of a hose failure. Key benefits include:
Safe dissipation of excess hydraulic fluid
Reduced risk of equipment damage
Enhanced protection for farm operators
This makes Safe-Sleeve an ideal solution for environments where hydraulic leaks could pose serious safety hazards.
Why Hose Protection Matters
Using reliable hose protection extends the life of your agriculture equipment, prevents downtime, and keeps workers safe. Whether it’s preventing abrasion, managing leaks, or making field repairs, Caplugs has the right solution to protect your hydraulic lines. Investing in high-quality hose protection ensures your farm machinery performs reliably, season after season.
Visit us at AGRITECHNICA 2025, hall 17 booth E23 and talk to our experts!
FAQs About Hydraulic Hose Protection in Agriculture
Q: What is the best hose protection for agriculture equipment? A: Spiral wraps like Safeplast Safe-Spiral and Pig’s Tail provide abrasion resistance and bundling support, while Safe-Sleeves protect against leaks and bursts.
Q: How can I install hose protection efficiently? A: Use tools like the Wrapman Unit or Safe-Bundler to install spiral wraps quickly and ergonomically.
Q: How do I choose the right hose protection for my equipment? A: Consider hose diameter, environmental exposure, risk of abrasion, and potential fluid hazards. Spiral wraps are ideal for bundling and abrasion protection, while Safe-Sleeves offer added leak safety. If you’re unsure which solution is best for your equipment, contact our product experts at +358 3 252 5911 for personalized guidance.
Contact us to request a quote for your desired product.
Injection moulding is a widely used manufacturing process for producing complex, high-precision components such as the Caplugs plastic product protection solutions. It is an efficient and cost-effective method, making it a popular choice in various industries. This blog post provides a short overview of injection moulding, and provides a step-by-step process for applying an injection-moulded cap.
A short history of injection moulding
Injection moulding is a manufacturing technique that involves injecting molten material, typically thermoplastics, into a mould cavity. The material solidifies inside the cavity to produce the desired shape. It is a highly versatile process used to make plastic products of a precise design and size.
Injection moulding was invented in the 19th century by John Wesley Hyatt, who was searching for a substitute for ivory billiard balls. He discovered that celluloid, a type of plastic, could be moulded into various shapes. This breakthrough paved the way for the development of injection moulding as we know it today.
Injection moulding revolutionised how products were made and is now an integral part of the manufacturing industry.
The importance of injection moulding in manufacturing
Injection moulding plays a critical role in the manufacturing industry for several reasons. It allows for mass production of parts with consistent quality and reduced costs while ensuring product uniformity. This is possible due to automated machinery that can rapidly manufacture significant volumes of components. Producing parts in high volumes is especially beneficial for industries such as automotive, gas and oil, aerospace, construction, electronics, and medical devices.
The process also enables flexible design and the creation of complex shapes with a high level of detail. The mould cavity can be customised to create parts with varying thicknesses, textures, and surface finishes. This versatility allows engineers to design innovative solutions to suit the requirements perfectly.
The exceptional precision, consistency, and accuracy of injection moulding is crucial, especially in industries requiring tight tolerances, such as aerospace and telecommunications.
The fast production cycles of injection moulding enable efficient turnaround times. Once the mould is set up and the initial parameters are established, the injection moulding machine can produce parts at a rapid pace. This efficiency is essential for meeting tight deadlines and meeting consumer demands. Further benefits of the process are laid out in the blog post about the advantages of injection moulding.
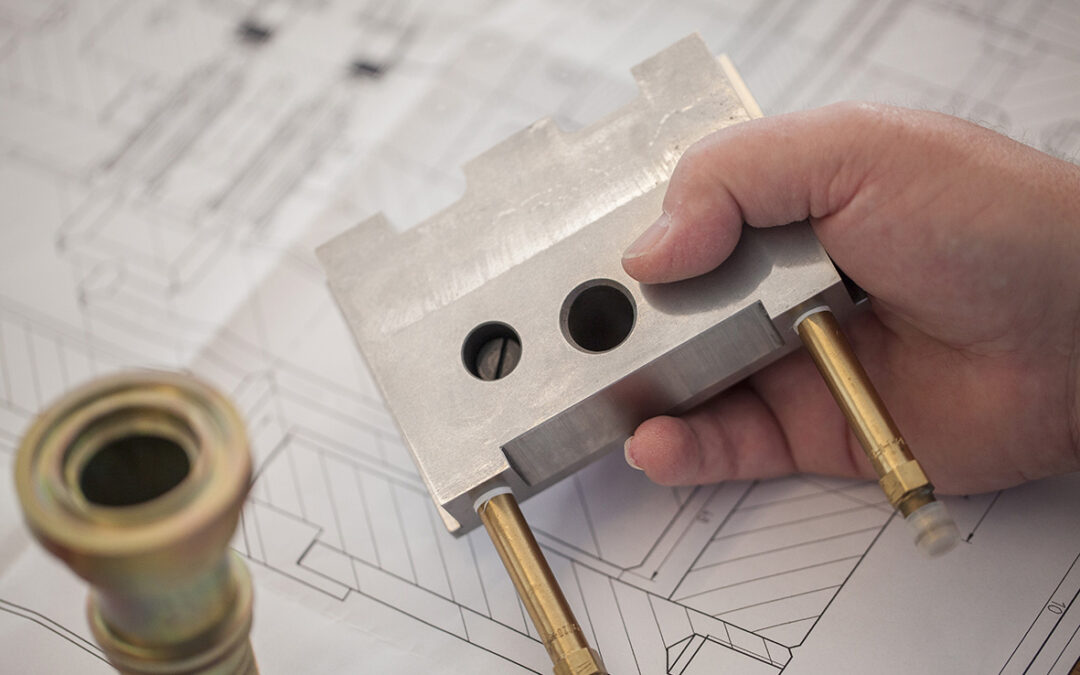
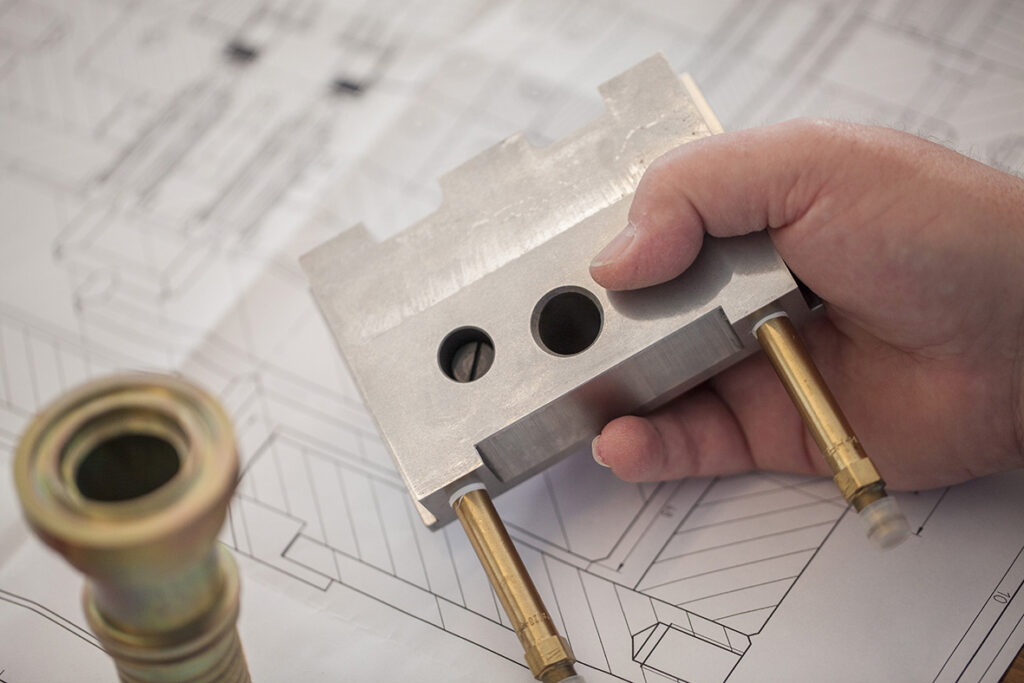
The role of the moulding cap in injection moulding
In injection moulding, the moulding cap keeps the mould secure during injection. It seals and encloses the molten material within the mould, ensuring it solidifies into the desired shape, and averts potential leaks that might cause flaws in the end product. It also regulates material flow, prevents material waste, and enhances accuracy, quality, and efficiency in the injection moulding process. Finally, the smooth surfaces and contours of the moulding cap enable the easy release and ejection of the moulded part from the cavity. This feature enhances productivity and minimises the risk of damage to the part during the ejection process.
Different types of injection moulding caps
Moulding caps come in various types, each designed for specific applications. In order to select the most suitable one for a particular injection moulding project, it is helpful to understand the different types.
The standard cap is widely used in general injection moulding applications. It offers a good balance of performance, cost-effectiveness, and versatility. Standard caps are available in different sizes and configurations to accommodate various mould designs and material requirements.
The hot runner cap is used for high-volume production and complex part designs. Hot runner caps feature a heating system that keeps the material in a molten state as it enters the mould cavity. This eliminates the need for re-heating the material with each injection cycle, resulting in faster production cycles and reduced material waste.
The multi-cavity cap is often used for projects that require multiple cavities, allowing for the simultaneous injection of multiple parts within a single mould. It improves productivity and efficiency by producing multiple components in each injection cycle.
The choice of moulding cap depends on the material used, the desired part design, and production requirements. Selecting the appropriate cap to ensure optimal performance and product quality is crucial.
Safety measures for applying the moulded cap
Safety is of the utmost importance when preparing to apply the moulding cap. Make sure to wear suitable protective gear such as gloves and safety goggles to shield against contact with heated materials and moving components. Know the emergency shut-off protocols and keep fire extinguishers easily accessible. Adhere to equipment warning signs and labels, confirm proper ventilation, and assess machinery for signs of wear. These precautions provide a secure environment, minimise accident risks, and facilitate a seamless application of the moulding cap.
Applying a moulded cap
Step 1: Research and preparation
Before starting the cap application, it is important to understand the types and purposes of the caps, as different caps have specific functions. Instructions or guidelines from the manufacturer can be helpful. Samples from the manufacturer also help to physically evaluate the cap’s suitability and size. Collect the tools needed and work in a clean, well-lit space.
Step 2: Clean the part
To ensure a strong bond, begin with a clean surface. Clean the area where the cap will be placed. Dust and dirt hinder adhesion, so use a suitable cleaning solution and a dry cloth. The surface should be completely dry before moving on.
Step 3: Positioning the cap
With the part clean, hold the cap over the designated area, aligning it carefully. Visual indicators or markings guide proper positioning. Double-check to ensure that the cap’s placement matches the product’s intended look and function.
Step 4: Applying the cap
Gently press the cap onto the part’s surface. Start with light pressure to allow adjustments. Gradually increase pressure as the cap adheres, ensuring a secure bond. Avoid excessive force to prevent damage. Follow the manufacturer’s instructions if adhesive is needed.
Step 5: Final check
After applying the cap, inspect it thoroughly. Check the alignment for evenness and symmetry. Look for gaps or irregularities indicating an improper fit. Verify that any locking mechanisms or features are engaged correctly. A meticulous final check ensures a successful application and a finished product that meets expectations.
FAQs
Q: What should I consider before applying a cap to my product?
It is essential to understand the cap’s type and purpose. Different caps serve different functions, so it helps to know the differences in order to select the appropriate cap.
Q: How can I research cap specifications?
The manufacturer’s instructions and guidelines provide information and advice on selecting the correct cap. Samples can be ordered to check the shape, size, and fit of the cap on the product.
Q: Why is cleaning the part necessary?
If the surface of the product is dirty or oily, the cap cannot form a strong bond.
Q: What is the significance of proper positioning?
Visual indicators or markings can indicate proper positioning. This is important to ensure the cap fits well and works as planned.
Q: How should I apply the cap to the part?
Start by gently easing the cap in place using light pressure. Gradually increase the force to achieve a secure fit.
Q: Can I use excessive force when applying the cap?
Avoid using excessive force to prevent damage to the cap or the part underneath. Gradual and controlled pressure is more effective.
Q: What if the cap requires adhesive?
If the cap needs adhesive, follow the manufacturer’s instructions for the correct amount and application method.
Q: Why is a final check important?
A final inspection ensures the cap is properly aligned, there are no irregularities, and any additional features function correctly.
View all the products in our catalogue or contact us for additional information and advice on selecting, ordering and fitting plastic caps.
The Caplugs range of plastic protective products is created by injection moulding and dip moulding. Not all types of plastic are suitable for injection moulding. This article explains why thermoplastics are suitable as an injection moulding material.
In an earlier article, the injection moulding process, in which plastics become liquid when heated, without losing flexibility, homogeneity and colour fastness, was explained. This group of plastics is also known as ‘thermoplastics’. Polypropylene and high density polyethylene (HDPE) are plastics commonly used for injection moulding.
Plastic injection moulding from granulate to end product
Unlike thermosets, thermoplastics take on the shape of the product precisely. Under high pressure, the liquid plastic fills the injection mould, creating a product that is precise down to the smallest product detail. This accuracy is essential to achieve the exact geometry and dimensions of injection-moulded products. It also enables the sustainable use of plastic products, as there is little waste, and eliminates the need for further finishing. This saves considerably on production time and costs.
Plastic with a high moulding capacity
Thermoplastics can also be formed in liquid form and under high pressure in the cavity of an injection mould. This is necessary to achieve a high-quality plastic product that exactly meets all product requirements in terms of geometry, dimensions, and level of finish. The material used influences the choice of heating, cooling and removal from the mould. Polyethylene retains the same properties, from the granules at the beginning of the process to the injection moulded product at the end.
Plastic injection moulding: light and robust
Thermoplastics are lightweight materials that can take severe knocks and are not affected much by weather and environmental conditions. This makes Caplugs’ plastic protection and masking products ideal for the aviation, petrochemical, electrical engineering, and automotive industries, among others.
Plastic granules are reusable
A significant advantage of thermoplastics is its reusability through re-shredding and heating. Thermoplastics can be completely reused for injection moulding, or used for dip moulding or other production methods for numerous other applications. Thermoplastics can be used multiple times over.
Would you also like to have your product injection moulded? Or are you looking for a plastic moulded protective or masking product? View the product range in our catalogue or contact us for more information or a customised solution.
Caplugs uses injection moulding to manufacture plastic protection and masking products. As mentioned in the blog post, injection moulding is used in industrial production to make three-dimensional plastic parts at scale. This blog post goes into more detail about the advantages of injection moulding for plastic protective products.
Precision moulding for a high level of detail
In injection moulding, liquid plastic is injected into a mould under high pressure. This process can produce complex parts with a high level of detail. This precision in the sizing and geometry of the components makes a difference for high-quality products.
Customisation and design freedom
It may appear that injection moulding is only used to produce large numbers of standard plastic products. However, injection moulding is also used to make custom-made protective solutions. An injection mould can be designed and created to exactly meet the desired geometry, size, and specifications required. Caplugs has a baby injection moulding machine for small runs.
Cost-efficient mass production
The quality of the mould (jig) used in injection moulding is critical. Once this has been created, large quantities of identical plastic products can be produced quickly, using the same mould and a very low error rate. For the production of several identical products in one go, multiple moulds can be used.
Additional cost-savings
In addition to the ability to produce a large number of identical products, injection moulding benefits from high production speed, minimal material wastage, and a highly automated production method that requires little manual work or post-processing.
Caplugs, the specialist in plastic injection moulding
For more information on customised injection moulding products or to order our standard protective and/or masking products, please contact us.
How does injection moulding of plastic protective products work?
Many protective products in the Caplugs range are made by injection moulding, including fully-customised products. This blog post explains the injection moulding process, and introduces its advantages.
What is injection moulding?
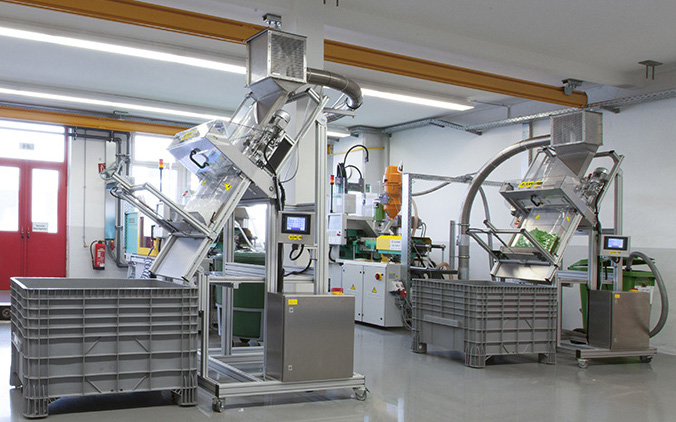
Injection moulding is commonly used in industrial production to produce three-dimensional plastic parts and products on a large scale. Molten plastic is injected into a mould before it cools and solidifies to take on the desired shape. Injection moulding is used in several industries, including automotive, electronics, packaging and medical.
The plastic injection moulding
Each stage of the injection moulding process helps make a robust, high-quality plastic product. This affects the geometry, dimensions, colour, and the level of finishing of the product. The injection moulding process consists of four stages:
1. Plasticising
Plastic pellets (granules) are the base material for injection moulding. The material goes from a storage hopper through a large loader. From there, the granulate is transported further via a screw. During this process, the plastic is heated until it melts. At the end of this step, the granulate has turned into a liquid and homogeneous mass.
2. Dosing
The molten plastic is transported through the screw and measured. The final dosage is determined by the size of the desired product.
3. Injecting
After the accurately dosed liquid plastic has been made from the granulate, about 95 to 98% of the cavity in the injection mould is filled with the liquid plastic under high pressure from the screw. The injection mould is not filled completely to enable venting and cooling. The high injection pressure ensures that the liquid plastic takes on the shape of the mould precisely – and thus the form of the finished product.
4. Cooling/pressing
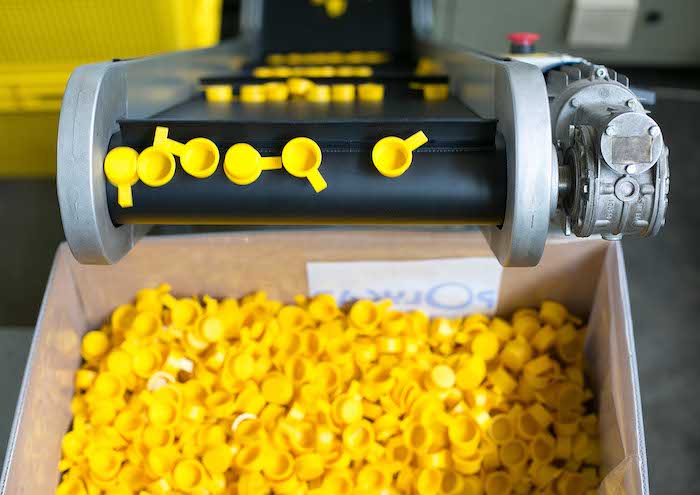
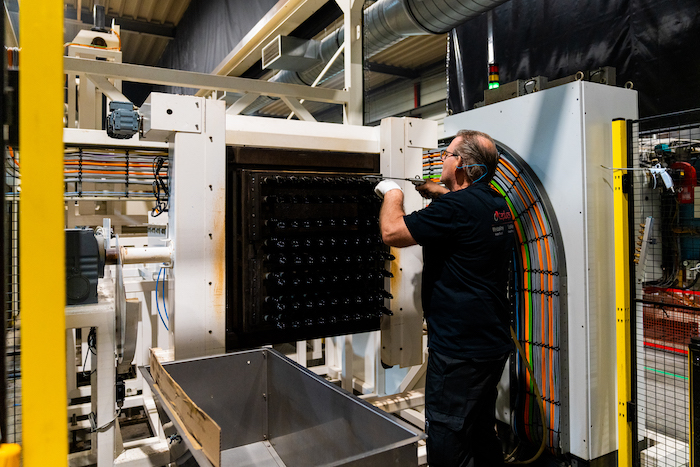
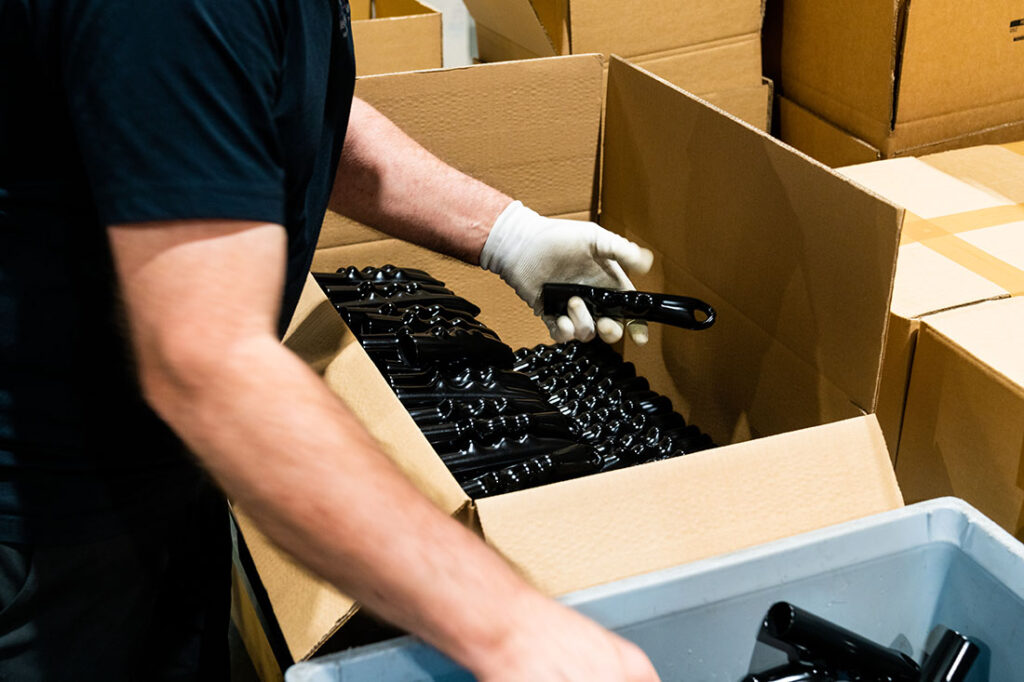
After injection, the cooling process starts immediately. The plastic is gradually reduced to a solid form through cooling channels in the mould. Any air present is also squeezed out of the injection mould during cooling. To complete this phase, the final spaces in the mould cavity, created by air bubbles and plastic shrinkage during cooling, are filled with additional liquid plastic. This is called emphasising the injection mould. The solidification temperature can vary depending on the type of plastic, and is programmed before the injection moulding process begins. After the product has cooled sufficiently, the mould opens, and a robot gently removes the product. The injection-moulded products are placed in a tray or a box via a conveyor belt.
The advantages of injection moulding
Injection moulding offers several advantages:
It is possible to produce highly accurate and detailed parts.
Complex shapes with minimal deviations can be made, ensuring consistent quality.
The injection moulding process is a very efficient method of producing large numbers of identical plastic parts and products.
Once the parameters are optimised, the injection moulding process can be repeated many times, making it highly cost-effective.
High production speed, minimal material wastage and automated processes also contribute to cost savings.
Due to the precision and finishing quality of the injection-moulded products, only minimal post-processing is required.
Find out more about these advantages in our blog on the advantages of injection moulding for protective and masking products or contact us.
Dip moulding is a manufacturing process in which a heated aluminium mould is immersed in a bath of liquid plastisol. The mould is then slowly withdrawn to allow the material to adhere and leave a thin layer on the mould. The shaped part is then cooled and separated from the mould. Dip moulding is used to make a variety of products, such as vinyl protective caps, but is also used as a coating for tools and equipment. The dipping technique is very useful for making items with complex shapes or small details.
Dip moulding products
Caplugs makes protective caps with the dipping moulds for a variety of applications, such as protecting threads, fittings, tubes and other fragile parts during transport and storage. Caplugs has the following dip-moulded products in its range:
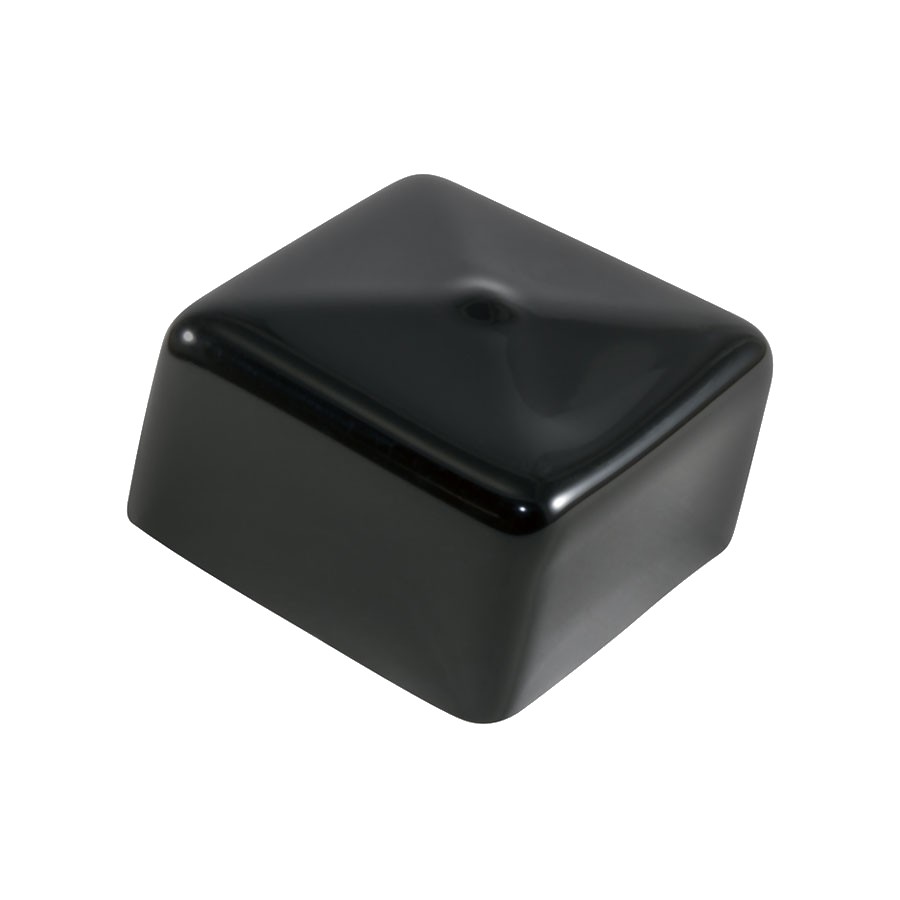
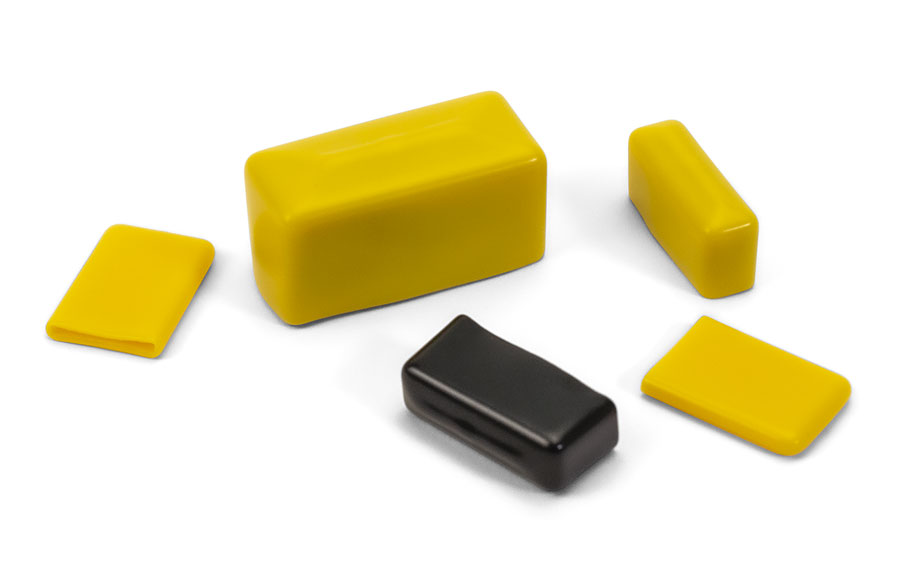
Square vinyl caps
These end caps are made of durable and flexible vinyl material. The capping square can be used as end caps for pipes and bars With that, the square vinyl caps provide protection against dirt, dust and other contaminants that can damage components. They are available in various sizes and colours and can be customized to meet specific customer requirements.
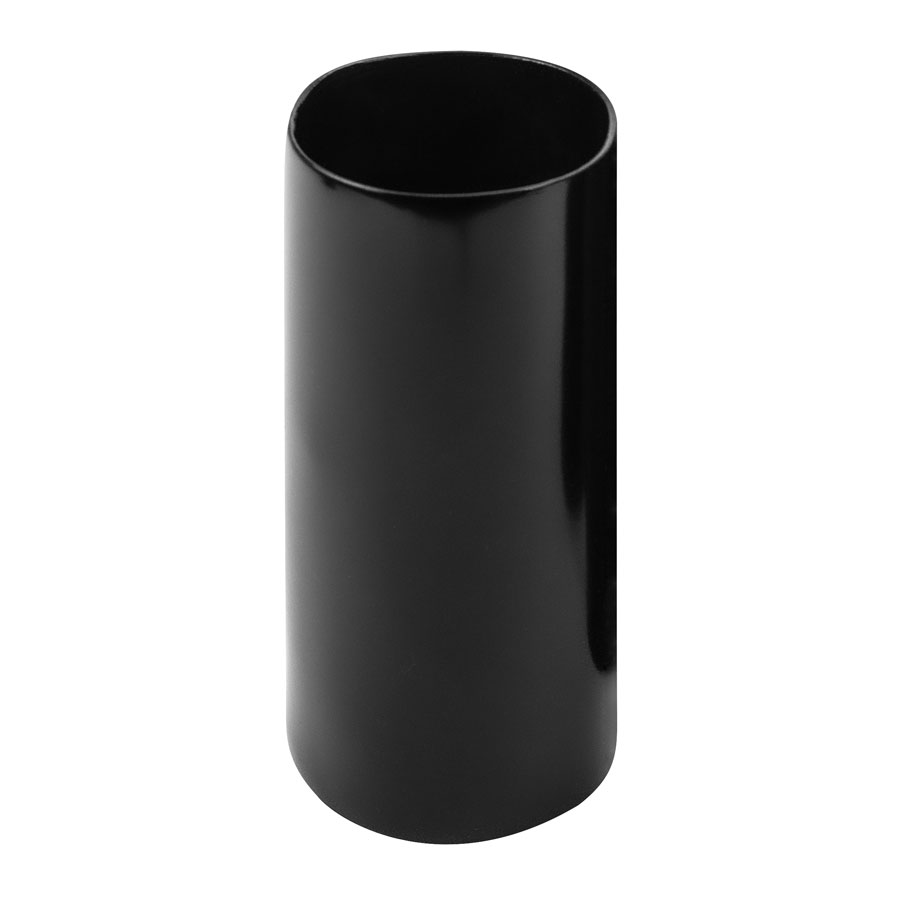
Round vinyl caps
Round vinyl caps are easy to install and remove due to the flexible material and provide a sleek finish. Additionally, they stay firmly in place and offer protection against bumps and scratches. Round caps are available in standard sizes and can also be customized to meet specific requirements.
Rectangular vinyl caps
The rectangular vinyl finishing caps and hand grips have a flat and closed end, therefore making them quick and easy to apply. The flexible material that the rectangular caps are made from ensures a good fit to protect and cover finished products, such as plate steel, box sections and bars.
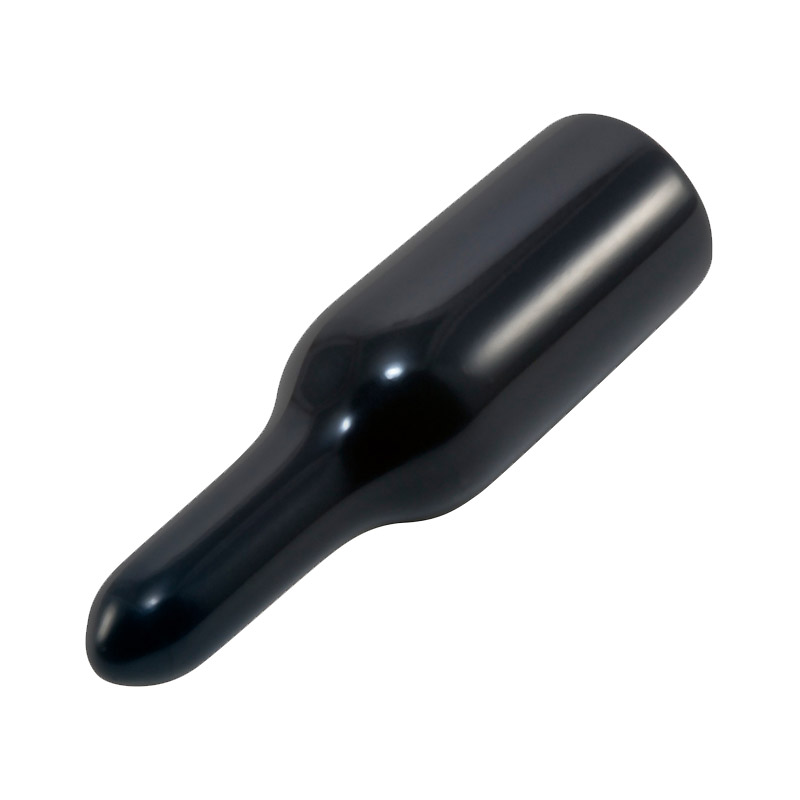
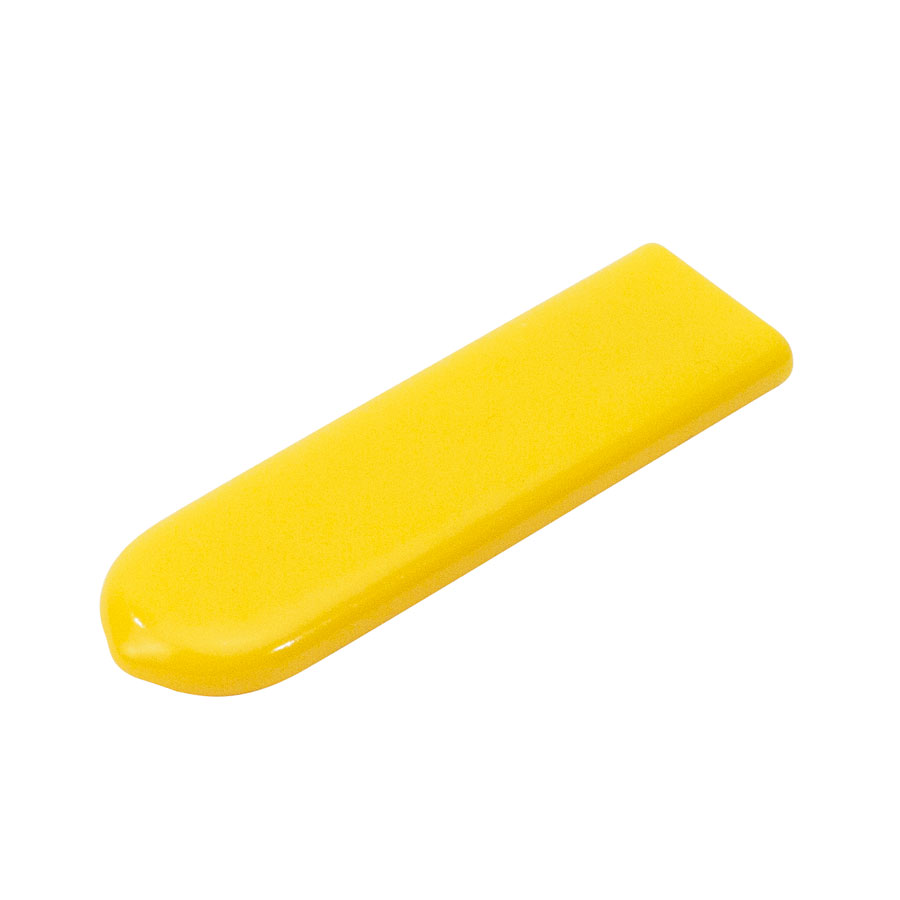
Pull Tab vinyl caps
Caplugs’ pull tab vinyl caps have an ergonomic design, giving them a better gripping surface and requiring less pulling force for removal. The flat grip at the top means the vinyl cap can be removed by hand and no other tools are needed. This reduces the risk of damaging the product. Due to the flexible material, the pull tabs have an excellent fit for a wide range of purposes, such as finishing and masking of products.
Vinyl sleeves
Caplugs’ vinyl sleeves are made of durable vinyl and come in different sizes to fit different sheet sizes. The smooth surfaces of these vinyl sleeves ensure that the records are protected from scratches as well as damage. The transparent colour of the sleeves makes it easy to identify the sheets and read what is printed on them. Moreover, Caplugs’ sleeves are easy to open and close, which increases the ease of use making the sleeves an ideal choice for protecting valuable equipment and tools.
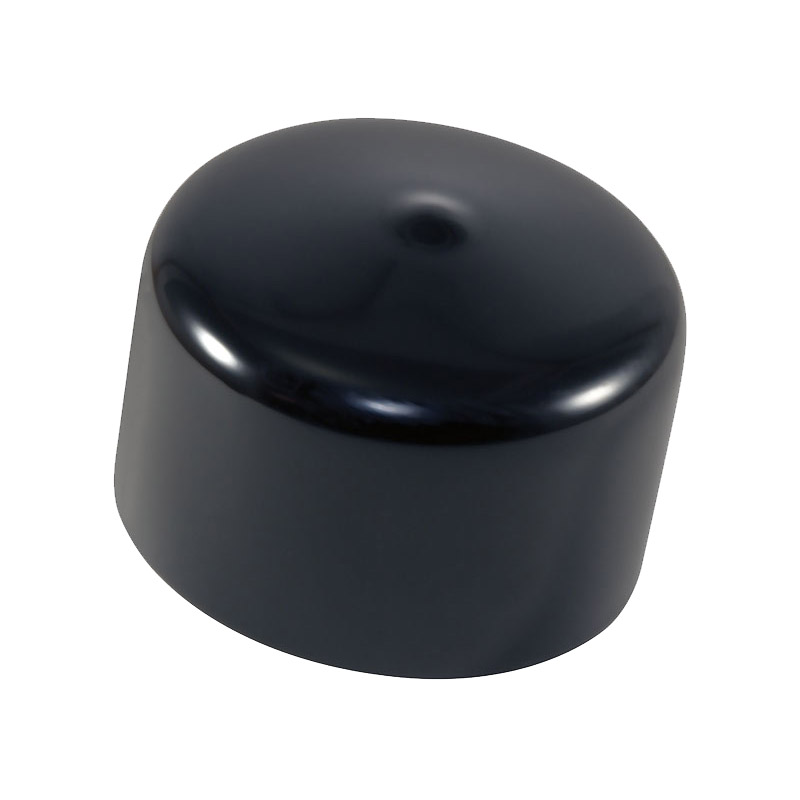
Vinyl covers
Caplugs’ vinyl covers are used for various pole protection applications. They protect poles from dust, dirt moisture and scratches. Caplugs’ vinyl covers are available in different sizes and are easy to use and apply. The covers provide an extra layer of protection, are high-quality and durable, making them long-lasting as well as a good investment for pole protection in, for example, the agricultural industry.
Wat is vinyl coating?
Dip moulding is commonly used to produce hollow moulded parts, but it can also be used to apply a layer of vinyl over a metal product. The purpose of vinyl coating is to improve the quality of metal products and protect the metal from corrosion as well as damage.
Caplugs makes grips for tools and equipment, plugs for electrical connectors and other custom-made components for industrial applications by the use of vinyl coating.
For which applications is dip moulding used?
Caplugs provides solutions for various industries, including automotive, aviation, medical, electronics and the food industry. With expertise in product design and the use of various manufacturing techniques, in particular dip moulding, is Caplugs able to provide customers with tailor-made solutions that meet their specific needs.
Questions or curious about the possibilities for your product? Then contact us without obligation!